8 Copy-Paste Prompts for Controlling AI Camera Angles
Eight copy-paste camera prompts, when to use sliders versus prompt text, and the steps that keep the subject's identity intact across AI-generated angles.
Updated 11 min read18+
AI camera angles are the vocabulary and settings that tell an image or video model where the virtual camera sits, how it moves, and what it sees. The fastest way to control one: write shot size plus angle plus movement directly into your prompt (a low-angle medium shot, dolly in slow), or use a tool's azimuth, elevation, and distance sliders when it offers them. Grab a prompt from the library below or click into your tool's angle controls and start there.
TL;DR:
- Using explicit camera height, orientation, and shot size terms in prompts ensures more accurate AI-generated angles and consistent subject identity.
- Incorporating movement, duration, and lens details at the start of prompts improves control over scene composition and technical accuracy.
- Managing reference images and character profiles is essential for maintaining face and identity consistency across multiple angles.
- Tools with 3D camera controls achieve precision, but prompt language remains key to conveying mood, lighting, and emotional tone.
- Common issues like horizon misalignment and flattened lighting can be fixed by explicitly describing camera placement and light source in prompts.
Camera Angle Vocabulary Every AI Prompter Should Know
Models respond to specific cinematography terms far more reliably than vague mood words. Runway's own guidance on camera prompting makes this point directly: naming the angle and movement beats describing a feeling and hoping the model interprets it correctly. Before you write a single prompt, it helps to know the three vocabulary layers that stack together: height, orientation, and framing.
Height and vertical position changes how powerful or vulnerable a subject looks:
- High angle — camera above eye level, looking down. Makes a subject look smaller or more exposed.
- Eye level — the neutral default. Feels like a conversation, not a statement.
- Chest level — slightly below eye level, common in portrait and product work for a natural, approachable read.
- Low angle — camera below the subject, looking up. Adds power, drama, or menace.
- Ground/worm's eye — extreme low angle, almost floor level. Dramatic, often disorienting.
- Overhead/top-down — directly above. Flattens depth but reveals layout, common for flat-lay product shots.
Orientation and profile describe which way the subject faces relative to the lens: front, three-quarter, profile (straight side), back, and the Dutch angle, which tilts the camera off its horizontal axis to create tension or unease rather than moving it up or down.
Shot size is the other half of the equation, and it combines with angle rather than replacing it. The standard scale runs from extreme close-up (ECU) through close-up (CU), medium close-up (MCU), medium shot (MS), medium wide shot (MWS), wide shot (WS), to long shot. A low angle on an extreme close-up reads as intimidating; the same low angle on a wide shot reads as epic scale.
A few quick pairings show how this works in practice:
- "Low-angle medium close-up, subject looking down at camera, dramatic key light."
- "Overhead top-down flat-lay of product on marble surface, soft even light."
- "Eye-level medium shot, three-quarter angle, natural window light from the left."
- "Worm's eye wide shot looking straight up, subject towering above frame."
The Prompt Formula That Actually Controls the Camera
One formula works across most current image and video models: [Shot size] + [Angle] + [Movement, direction, and speed/duration] + [Subject and action] + [Lens/look] + [Lighting/mood] + [What the shot reveals].
Order matters here. Models weight earlier tokens more heavily, so leading with vague adjectives and burying the camera geometry at the end of a long sentence is one of the most common reasons a generated shot comes out wrong. Put the technical terms first, the mood second.
Here are eight prompts built on that formula, ready to copy and adapt:
- Portrait, low angle: "Low-angle close-up, camera positioned below eyeline pointing up, subject standing still, 85mm lens look, soft directional key light from upper right, revealing confidence and height."
- Product, top-down: "Overhead top-down shot, static camera, product centered on neutral background, macro lens look, soft diffused light, revealing texture and packaging detail."
- Slow dolly, medium close-up: "Medium close-up, eye level, slow dolly in over 3 seconds, subject turning head toward camera, 50mm lens look, warm side light, revealing a shift in expression."
- Orbit shot, product: "Medium shot, eye level, slow 180-degree orbit around subject, product rotating in place, studio lens look, even three-point lighting, revealing all sides of the object."
- Flat-lay wide: "Wide overhead shot, static camera, multiple objects arranged on table, wide-angle lens look, bright natural light from window above, revealing full composition."
- Low-angle action with duration: "Low-angle wide shot, camera below subject looking up, subject running toward camera over 2 seconds, fast shutter look, harsh overhead sun, revealing motion and urgency."
- Dutch angle tension shot: "Medium shot, 15-degree Dutch tilt, static camera, subject standing in doorway, moody lens look, single hard side light, revealing unease."
- Three-quarter profile, chest level: "Chest-level medium close-up, three-quarter angle, static camera, subject glancing off-frame, portrait lens look, soft window light from left, revealing quiet mood."
Pro Tip: When a simple label like "low angle" isn't landing right, add an explicit geometry line: "camera positioned below the subject's eyeline, pointing upward, horizon low in frame." Spelling out the physical camera position fixes more angle errors than swapping adjectives ever does.
Sliders or Prompt Language: Which One Actually Controls the Shot?
Tools that offer 3-axis controls (azimuth for horizontal rotation, elevation for vertical tilt, distance for zoom) let you set an exact, repeatable angle instead of re-rolling a prompt and hoping. That precision matters most when you need the same angle across multiple renders.
Prompt language, on the other hand, is where narrative and feeling live. It expresses lens character, lighting mood, pacing, and what the shot is meant to reveal about the subject, none of which a slider can capture.
The mistake most people make is fighting the two against each other:
- Let settings define the physical path (where the camera sits and how it moves).
- Let the prompt define the feel (mood, lighting, lens character, emotional beat).
- Never double-direct. If your slider is set to a 45-degree elevation, don't also type "extreme low angle" in the prompt.
- For ideation, start prompt-first and iterate on wording. For production, lock in settings once you find the angle, then adjust the prompt's mood language between renders.
Fixing the Most Common AI Camera Angle Problems
Most "almost right" AI shots trace back to four fixable issues. Run this checklist before you re-roll:
- Horizon line is wrong. Runway's guidance explains that low angles push the horizon down in frame and high angles push it up. If the horizon looks off, add an explicit line: "camera looking up, horizon low in frame" or the reverse.
- Lighting flattens the shot. Vague terms like "cinematic" often produce flat, directionless light. Name the light source, direction, and hardness before adding any style words at all.
- Identity drifts between angles. The face, outfit, or markings shift subtly from one generated angle to the next. Reference images and stored character profiles anchor this far better than repeating a text description each time.
- Movement looks warped or smeared. Complex multi-phase moves (dolly plus pan plus zoom in one shot) are where most artifacts appear. Simplify to a single move, add explicit duration and speed, or generate each phase as a separate clip and stitch afterward.
Why Camera Angle Shapes the Story, Not Just the Composition
A camera angle is not a neutral technical choice. It tells the viewer how to feel about what they're looking at before a single word of dialogue or caption appears. A low angle on a subject makes them look dominant or threatening. The same subject shot from a high angle, looking down, reads as small, isolated, or at someone else's mercy. Neither reading is subtle. Audiences pick it up instantly, often without consciously noticing why.
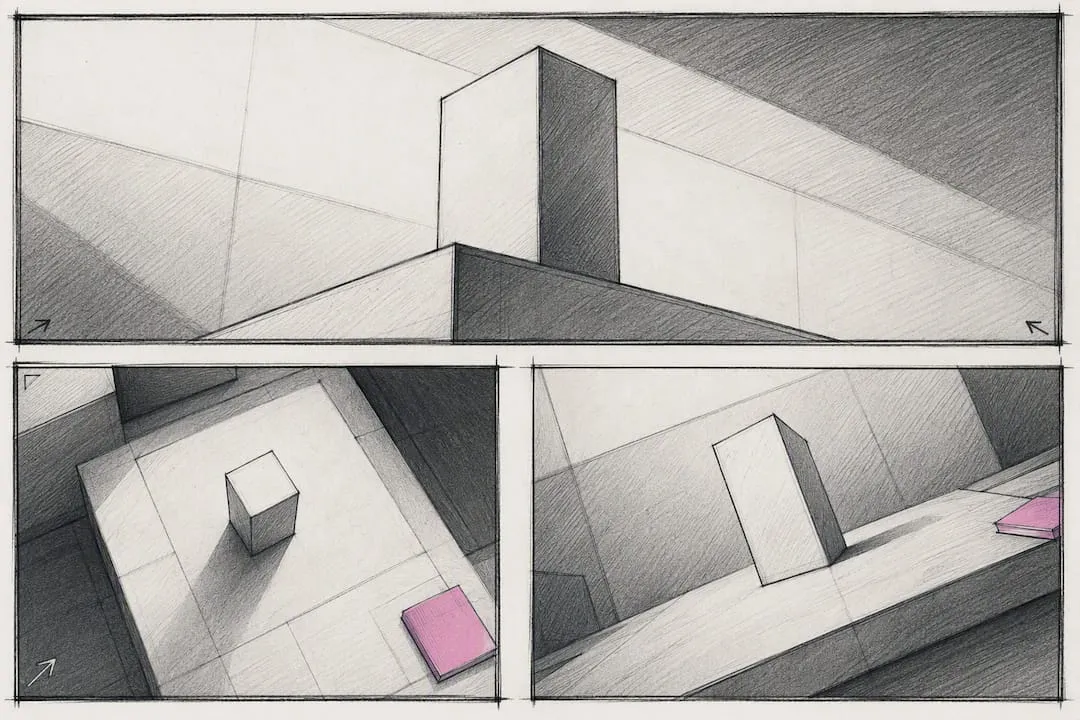
This matters more in AI-generated content than in traditional photography, because AI tools make it trivially easy to generate the same subject from a dozen angles in minutes. That speed is a gift and a trap. A creator who defaults to eye-level medium shots for every image loses the emotional range that angle variation provides. A creator who mixes in a genuine low angle for a confident pose, a soft overhead for an intimate moment, or a Dutch tilt for tension is telling a more layered visual story with the same subject and the same setting.
Framing also directs attention. A tight close-up isolates an expression; a wide shot places that same expression in context, surrounded by environment. AI models let you test both in the time it used to take to set up one physical camera position, which means angle choice has shifted from a production constraint to a purely creative one.
How AI Camera Angle Control Shows Up Across Film, Games, and VR
Filmmakers now use AI angle generation for previsualization, turning a single storyboard frame into multiple camera options before committing a crew and budget to a physical setup. Storyboard with AI images has become a genuine pre-production step rather than a novelty, letting directors test a low angle against an eye-level version side by side.
Game development leans on a related but distinct capability: dynamic, AI-assisted camera systems that adjust angle and distance in real time based on what's happening in a scene, tightening in during a tense encounter or pulling wide during exploration. This isn't the same technology as static AI image generation, but it draws from the same underlying vocabulary of angle, distance, and elevation.
Virtual reality and 3D content pipelines use multi-angle tools to take a single reference image and generate a dozen or more cinematic angles around it while preserving the subject's identity. That single-reference-to-many-angles approach is becoming the standard way creators build out a consistent visual set without reshooting or re-rendering from scratch for every new perspective.
What AI Camera Angle Tools Still Get Wrong
AI angle generation has real limits, and pretending otherwise sets creators up for frustration. Identity consistency remains the toughest technical problem: ask a model for the same subject from five different angles and you'll often get five subtly different faces, unless you're actively managing reference images or a stored profile. Complex multi-phase camera moves (a combined dolly, pan, and zoom) still produce warping and smearing more often than simple, single-phase moves. Extreme angles like true worm's eye or perfectly vertical top-down shots sometimes confuse depth and proportion in ways a real camera never would.
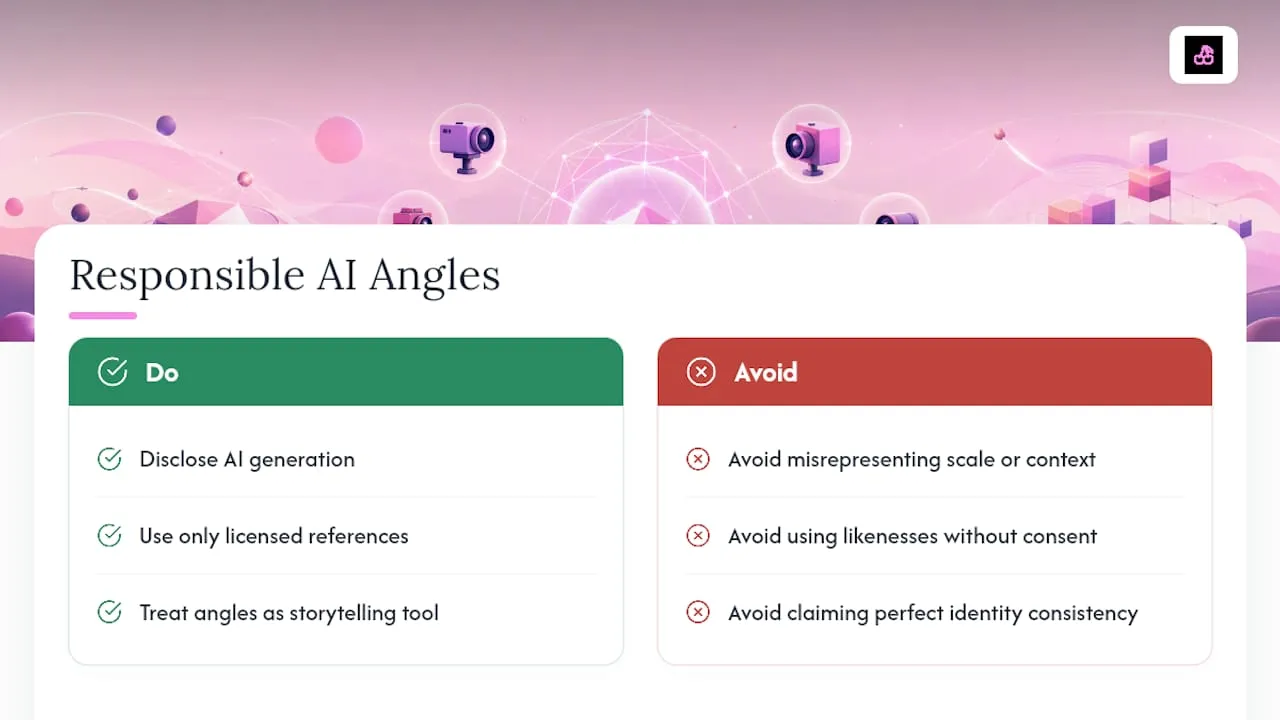
There are ethical considerations too, and they deserve a direct answer rather than a footnote. Angle manipulation can misrepresent scale, context, or a subject's actual appearance in ways that mislead a viewer, which matters most in journalism, advertising claims, and any content presented as documentary fact. Using a stored likeness or reference image of a real person to generate new angles without their consent raises consent and rights issues that have nothing to do with the technology being impressive. Responsible use means being transparent about AI generation when it matters to the viewer, only using reference images and likenesses you have rights to work with, and treating angle control as a storytelling tool rather than a way to fabricate a false impression of a real scene or person.
Our Take: The Prompt Library Is the Easy Part
The angle vocabulary and the copy-paste formulas in this piece solve the mechanical half of the problem in an afternoon. Most creators pick up shot-size and angle terms fast, because the vocabulary is finite and the results are visible immediately. The half that actually determines whether an AI camera angle workflow scales is identity consistency, and conventional advice mostly skips it.
Rewriting a prompt for the tenth angle of the same subject and hoping the face holds steady is not a workflow. It's a coin flip that gets more expensive with every generation you spend on a mismatch. The creators getting genuine production value from AI camera control are the ones treating reference management as the foundation, not an afterthought bolted on when things start drifting.
Prioritize this order: lock a consistent subject reference first, then build your angle and shot-size vocabulary on top of it, then layer in movement and mood language last. Skip step one and every other skill in this guide just produces prettier failures faster.
Generate Consistent Angles Without Losing the Face Each Time
Every troubleshooting fix in this guide gets easier when the subject itself doesn't change between renders. OnlyNudes builds around that exact problem: its AI character creator lets you set up a subject once and store the profile, so every low angle, top-down shot, or medium close-up you generate afterward pulls from the same reference instead of reinterpreting the face from scratch. That's the difference between a angle-varied content set that reads as one continuous character and a folder of near-misses.
Photo sets and clips often use pay-per-render pricing without subscription, allowing you to pay only for the angles you use. Credit top-up packs are available in a variety of amounts. Set up a character profile and generate your first multi-angle photo set to see how continuity holds across shots.
Sources
FAQ
What are the 12 basic camera angles?
Most lists combine height terms (high, eye level, low, ground/worm's eye, overhead) with orientation and specialty terms (Dutch angle, over-the-shoulder, point of view, bird's eye, front, profile, and back), though exact counts vary by source since "basic" angles aren't a strictly standardized set.
Can AI change the angle of a photo?
Yes. Tools built for multi-angle generation can take one reference image and produce new camera angles while preserving the subject's identity, and prompt-based image and video models can generate new angles directly from text.
How do I change camera angle using AI?
Write the angle and shot size directly into your prompt (for example, "low-angle medium close-up") following the shot size, angle, movement formula, or use a tool's azimuth, elevation, and distance sliders if it offers manual camera controls.
What are the 9 camera angles?
A common shorter list groups eye level, high angle, low angle, bird's eye/overhead, worm's eye, Dutch angle, over-the-shoulder, point of view, and profile/side angle, though different guides group these terms differently.
Does OnlyNudes support generating the same character from multiple angles?
Yes. Its AI character creator stores a character profile so photo sets and clips generated from it keep the same face and features across different angles and shots.
Make the content you just read about
One reference, a line of text, and a feed's worth of photos and clips. Pay per render, no subscription.